

Setting up two-factor authentication
Overview
Two-factor authentication (2FA) adds a time-based one-time password (TOTP) step to your CloudPE login. Once enabled, signing in requires your usual credential plus a code from an authenticator app, and the second-factor challenge is applied on every login path — password, magic link, and social sign-in.
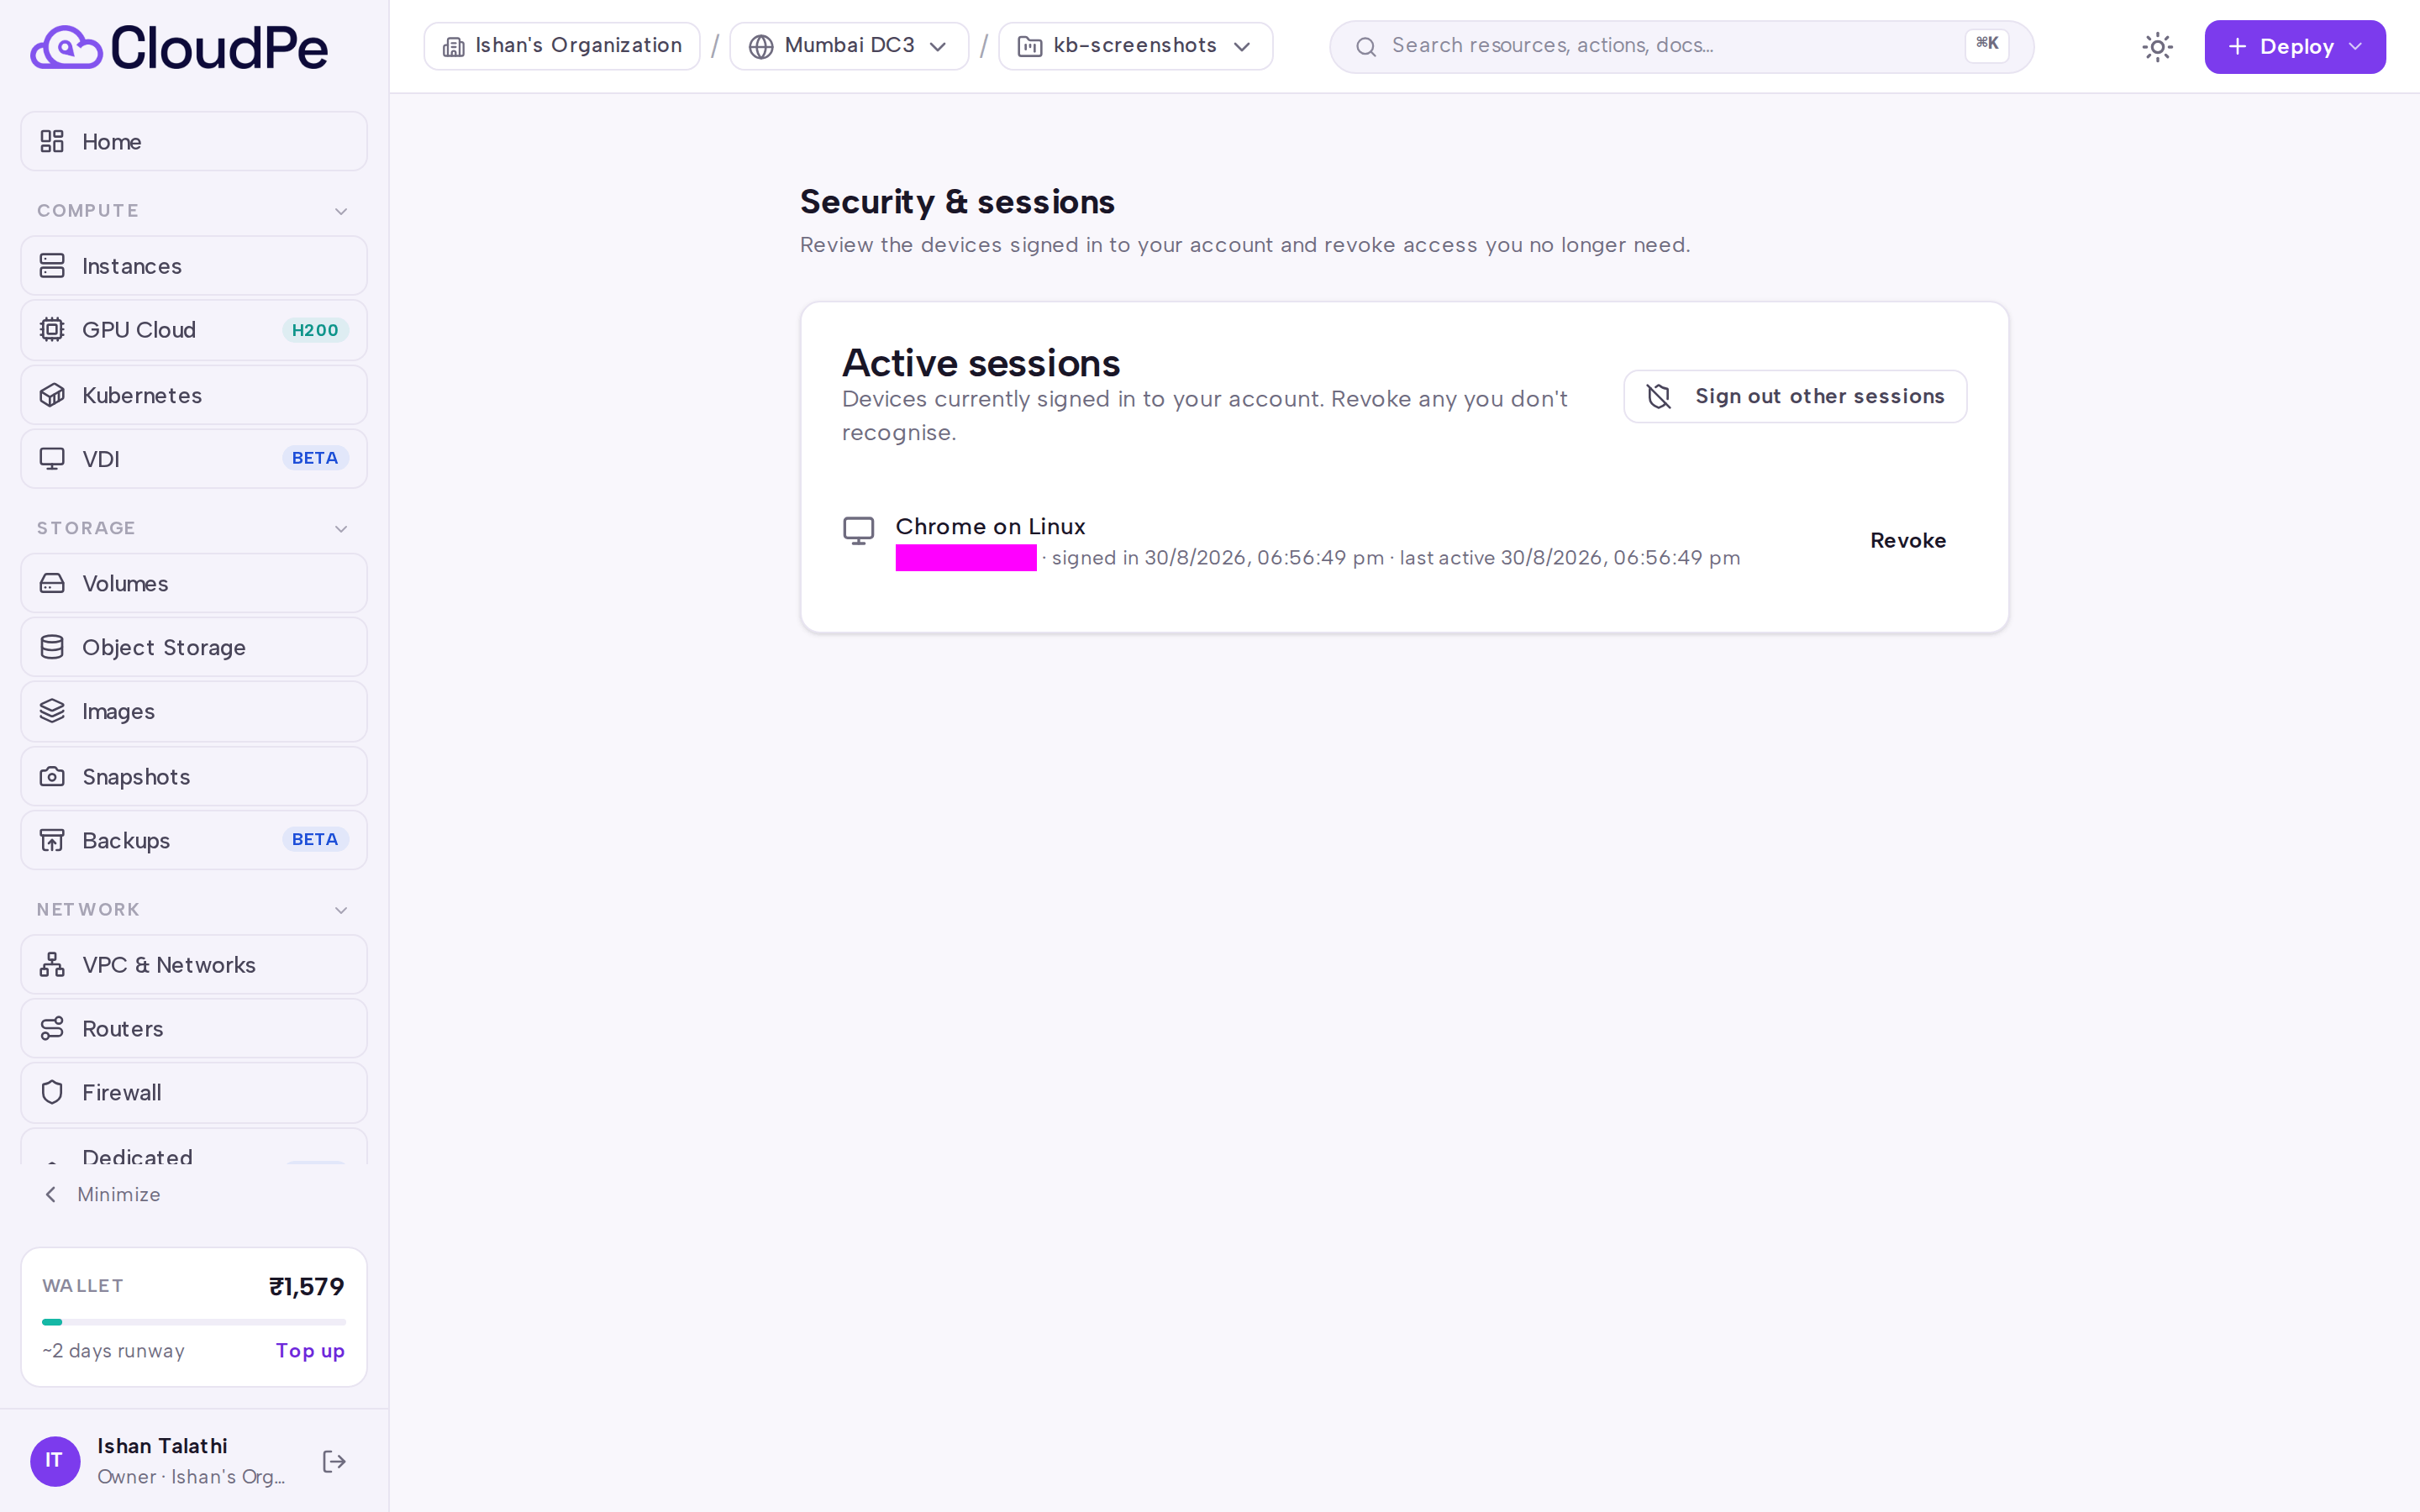
2FA is configured from the Security tab of Settings, and the sessions it protects are listed on the Security & sessions page. Backup codes can be generated after 2FA is active so you can still sign in if your authenticator device is unavailable.
Before you start
- You must be signed in to the dashboard with the account you want to protect. 2FA is a per-user setting, not an organization-wide one.
- Have an authenticator app that supports TOTP installed on a phone or desktop.
- Know your account password — CloudPE asks for it when you disable 2FA, and re-authentication is required for sensitive changes.
- If your account is governed by a policy that mandates 2FA, you can enable and reconfigure it but you cannot turn it off.
- No KYC, wallet balance, quota, or project selection is required to use 2FA.
Steps
Open Settings from the ACCOUNT section of the sidebar.
Select the Security tab and find the Two-Factor Authentication section.
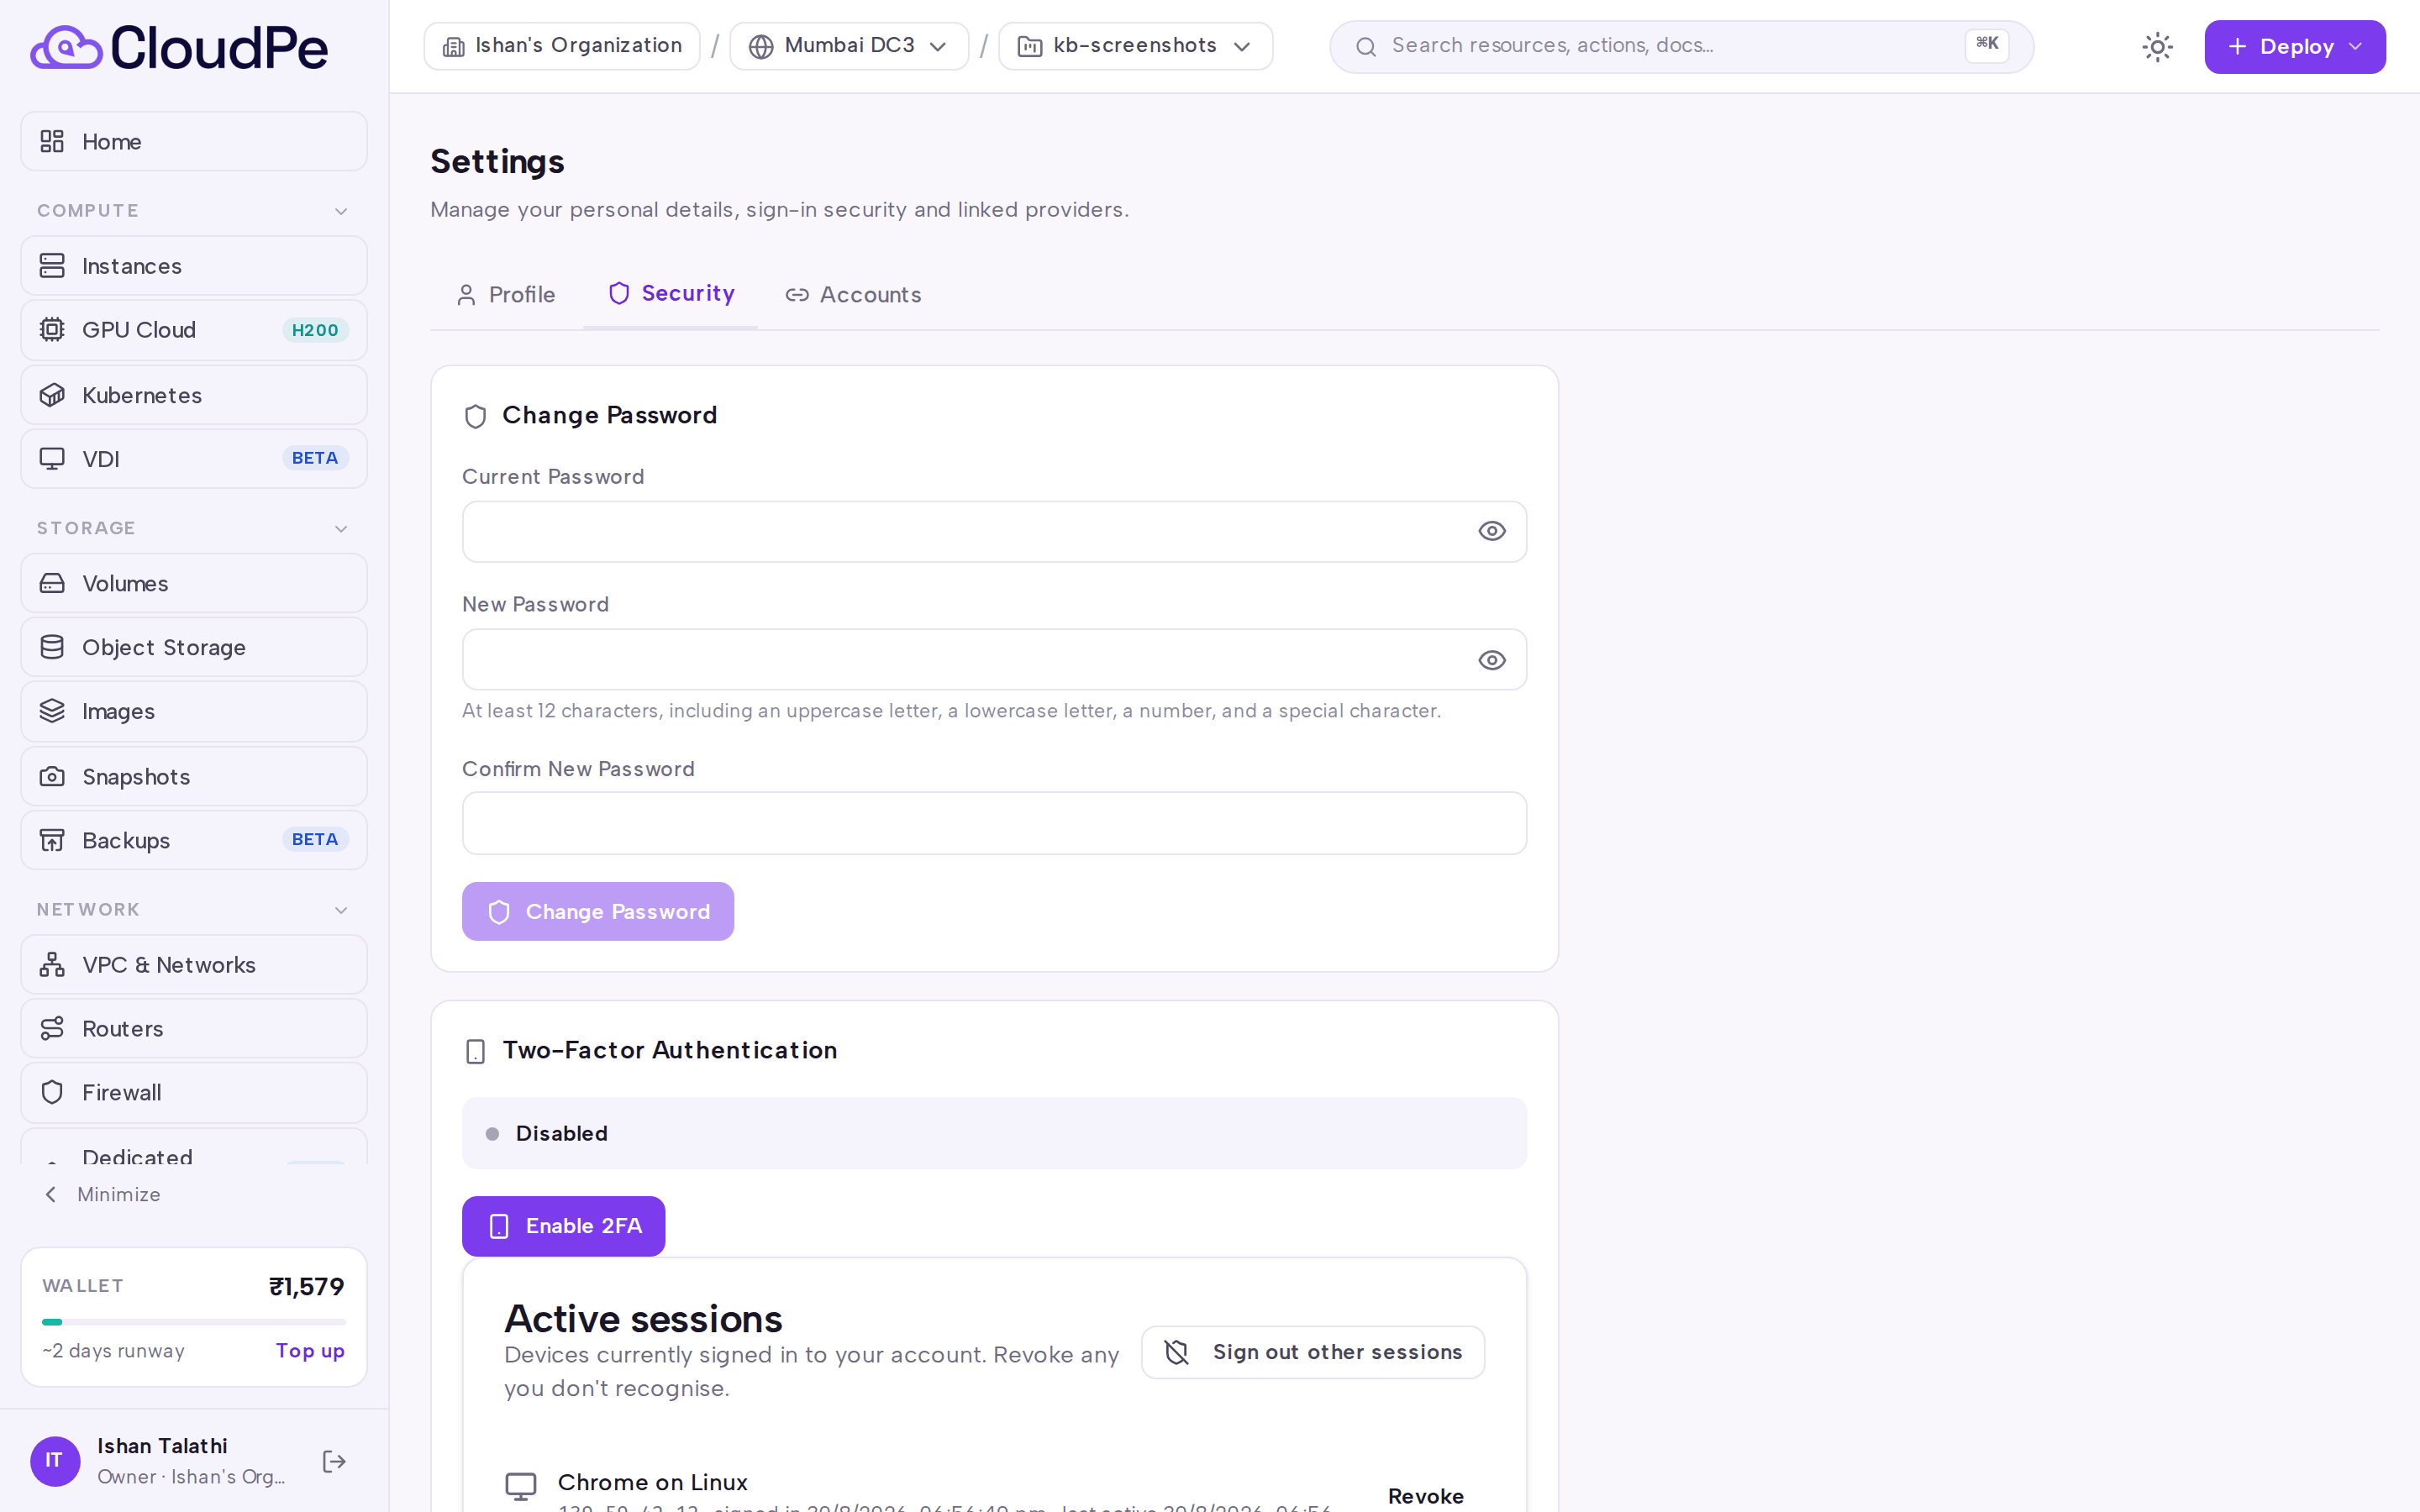
Click Enable 2FA and follow the on-screen setup to add the CloudPE account to your authenticator app.
Enter the current code shown by your authenticator app to confirm the pairing. The code must be fresh — an expired code is rejected.
Generate your backup codes once 2FA is active, and store them somewhere separate from the device that runs your authenticator app. Backup codes can only be generated while 2FA is enabled.
Sign out and sign back in to confirm the second-factor challenge appears. After signing in, review Security & sessions and use Sign out other sessions if you see a session you do not recognise.
To reconfigure 2FA with a new device, disable it first, then run the setup again.
API
Session management for your own account is available over the API. Use these endpoints to review or revoke the interactive sessions that 2FA protects.
| Method | Path |
|---|---|
| GET | /api/v1/auth/sessions |
| DELETE | /api/v1/auth/sessions/{session_id} |
| POST | /api/v1/auth/sessions/revoke-others |
List your active sessions:
curl -X GET https://app.cloudpe.com/api/v1/auth/sessions \
  -H "Authorization: Bearer <API_KEY>"
Revoke a single session:
curl -X DELETE https://app.cloudpe.com/api/v1/auth/sessions/<session_id> \
  -H "Authorization: Bearer <API_KEY>"
Revoke every session except the one making the call:
curl -X POST https://app.cloudpe.com/api/v1/auth/sessions/revoke-others \
  -H "Authorization: Bearer <API_KEY>"
Limits & billing
- Two-factor authentication is part of every CloudPE account and is not billed.
- Interactive logins are capped at 1 active session per user by default, so a new sign-in signs the older device out.
- A session access token is valid for at most 1440 minutes; the second-factor challenge is re-applied on the next login.
- Changing your password revokes all your other sessions; a password reset revokes all sessions, and administrative removal of 2FA revokes the affected account's sessions.
- Revoked and expired session records are cleaned up after 30 days.
- API keys are a separate credential class and are not subject to the interactive 2FA challenge or the device cap.
Troubleshooting
| Error | What it means | What to do |
|---|---|---|
Invalid verification code. Please try again with a new code from your authenticator app. |
The code was wrong or had already rolled over. | Wait for the next code and enter it promptly. If it keeps failing, check that your device clock is set automatically. |
2FA is already enabled |
2FA is active on the account. | No action needed; you do not have to enable it again. |
2FA is already enabled. Disable it first to reconfigure. |
You tried to run setup while 2FA was active. | Disable 2FA, then start the setup again on the new device. |
2FA is not enabled on this account |
The action requires an active 2FA configuration. | Enable 2FA from the Security tab first. |
2FA must be enabled to generate backup codes |
Backup codes were requested before setup was completed. | Finish the setup, then generate the codes. |
Incorrect password |
The password entered for confirmation did not match. | Retry, or reset your password and then repeat the action. |
Two-factor authentication is required for your account and cannot be disabled. |
Policy mandates 2FA for this account. | Reconfigure to a new device instead of disabling; contact your administrator if you are locked out. |
Failed to generate backup codes |
The backup-code request did not complete. | Retry from the Security tab; if it persists, raise a support ticket. |
User not found |
The account referenced by the request no longer exists. | Sign in again and retry from Settings. |
FAQ
What happens if I lose my authenticator device? Use one of the backup codes you saved when enabling 2FA. If you have no codes left, an administrator can remove 2FA from the account; that removal itself requires a step-up re-authentication and revokes the account's sessions, so you will need to sign in again.
Does 2FA apply to logins through Google or another social provider? Yes. The second-factor gate runs in the shared login pipeline, so it applies to password, magic-link, and OAuth logins alike.
Do my API keys stop working when I enable 2FA? No. API keys authenticate on their own credential path and are exempt from the interactive session checks.
Can I stay signed in on more than one device? By default the platform allows 1 active session per user, so signing in elsewhere ends the earlier session. You can see and end sessions yourself on the Security & sessions page.
Where do I check for sessions I do not recognise? Open Security & sessions and review Active sessions, then use Sign out other sessions.